Primary Department Supported: Servicing
Super Powers Needed? - NO
Developer Support Needed? - NO
Important Considerations & Best Practices:
- Email addresses cannot be shared—each contact must have a unique email
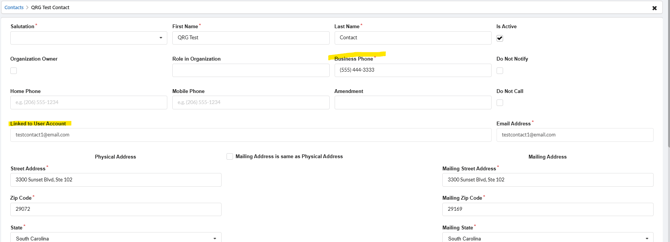
- If the original contact has a Linked User Account, the new contact should also have one
- Borrowers/Contacts who use the Payment Portal will need to re-enroll for the Payment Portal if we add/update their email address to a new one.
Email Addresses for Contacts are updated by:
-
Merging Contacts - Creating a new contact using the correct email and merging the old contact into the new one
-
-
Reminder: After merging, all loans and entities previously linked to the old contact will automatically update to the new contact
-
Review the old and new contact records before deciding whether to merge or keep them separate
-
Identify all loans and entities that will be impacted
-
Clarify with the ticket requester whether the contact should be merged (removing the old record entirely) or kept as a standalone replacement only for specific loans.
-
- Creating a new contact and attaching it directly to specific loans (if merging would incorrectly impact multiple loans or organizations)
Instructions:
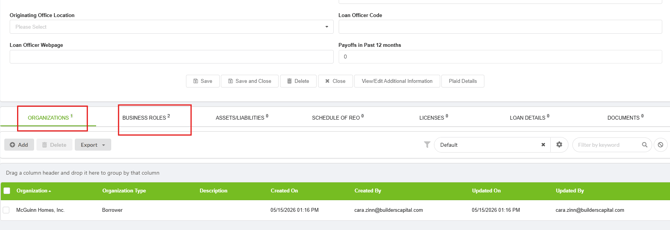
Review the Existing Contact
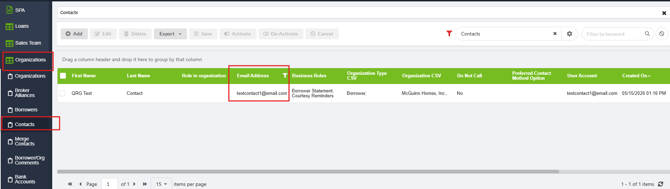
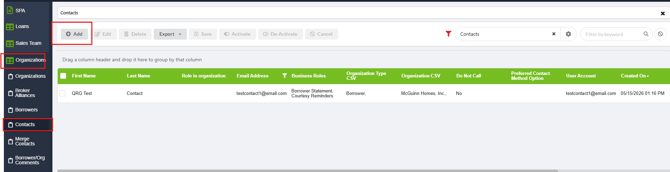
- From LMS Menu → Organizations → Contacts
- Search by name or email
- Open the contact and review:
- Borrower or Organization affiliations
- Linked User Account details
Create the New Contact
From LMS Menu Select
- Organizations
- Contacts
- Select "ADD"
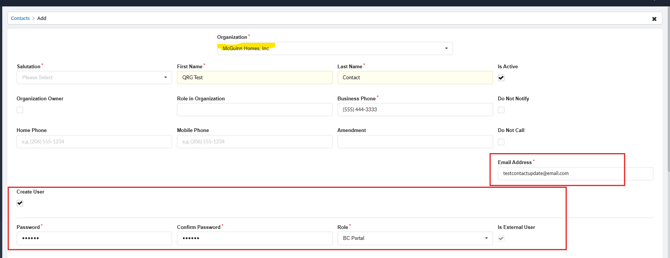
- Create the new contact using:
- The same details as the original contact
- The new email address
- If needed, select Create User to establish a User Account
- Save and Close
1. Merge Contacts
Instructions for Merge Contact
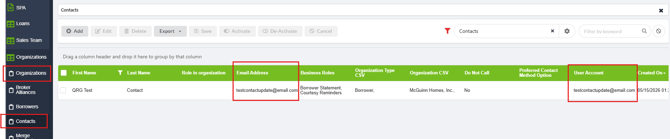
Verify the merge by selecting Organizations → Contacts and verify:
-
Email address Column shows updated everywhere
-
User Account column reflects the new email
2. Attaching the new contact it directly to specific loans on the Entities Tab
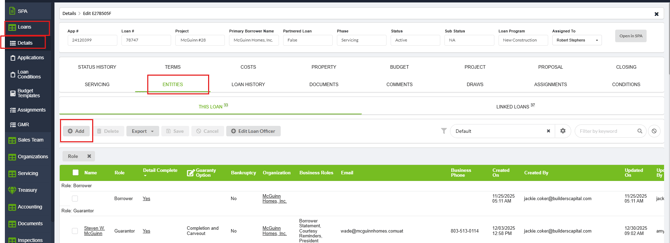
From LMS Menu Select- Loans → Details
- Locate and open the loan
- Select the Entities tab
- Click Add
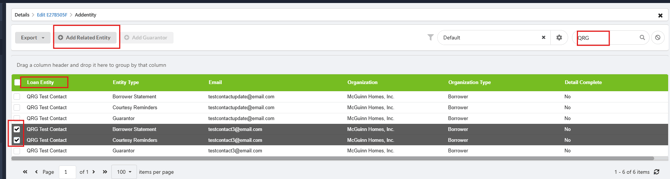
- Search for the new contact (by name or email)
- Checkmark next to each Applicable Business Roles (i.e. Borrower Statement, Courtesy Reminders)
- Click Add Related Entity or Add Guarantor, then close