
Primary Department Supported: Accounting
Description: Instructions for posting a loan payment in LMS, including approval requirements, waterfall payment order, allocation steps, and validation checks.
Super Powers Needed? - NO
Developer Support Needed? - NO
Context and Common Situations
This process is often part of correcting the Loan History, such as:- Voiding an incorrect payment and needing to re‑post funds
Important Considerations & Best Practices
- Identify the effective date and Obtain Proper Approval as needed
- Requests from departments outside of accounting: Get approval from accounting leadership to post (Helen Yoon, Richa Pandey, Megan McKell, Lisa Aplin)
- Requests from accounting members: For payments with effective dates in prior months: Get approval from accounting leadership before posting (Helen Yoon, Richa Pandey, Megan McKell, Lisa Aplin)
- Use Caution on Post Payments Screen:
- The Post Payments screen shows every open charge for every loan under the borrower.
- When applying payments, follow the required waterfall order
- Past Due Interest
- Past Due Fees
- Current Due Interest
- Current Due Fees
- Principal
- Always ensure instructions clearly indicate which charge(s) should be paid and how the payment should be allocated.
- Always confirm the loan number before selecting charges in the Post Payments Screen.
Instructions
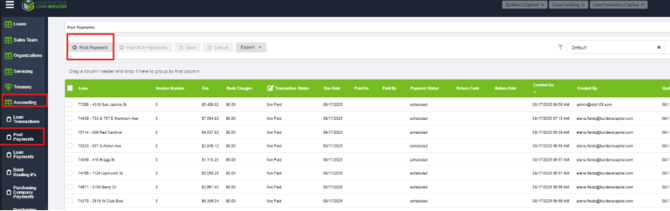
From the LMS Menu Select
- Select Accounting
- Select Post Payments
- Click Post Payment.
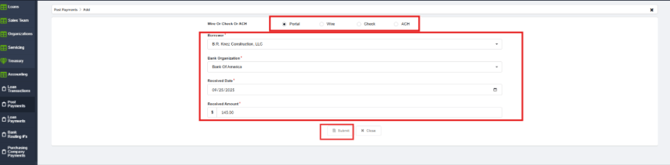
- On the first Screen:
- Select the Payment Method (Portal, Wire, Check).
- Enter the Borrower Name
- Add the Bank Organization (usually prefills)
- Enter the Received Date
- Enter the Amount received.
- Click Submit.
5. On the Second Screen: Apply the Payment:
-
-
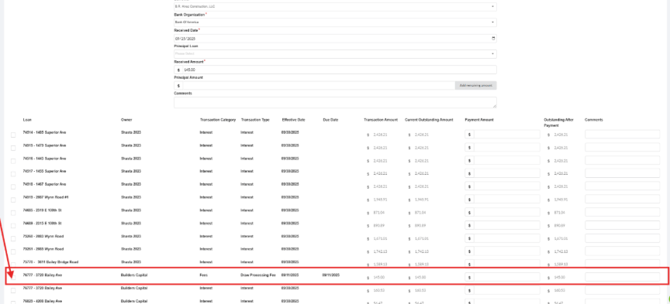
Review the list of open charges and loan numbers displayed on the page
-
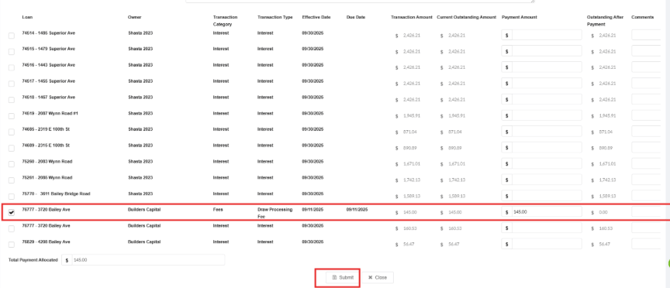
Check mark the charge(s) next to the loan number which the payment should be applied. (the system will automatically move the funds due into the allocation fields)
- If any funds are being applied to principal you can allocate funds to principal at the top of the page using the dropdown or "add remaining amount"
- Review the "Total Payment Allocated" box at the bottom to ensure all funds are accounted for"
-
Click Submit to apply the payment
-
Validation and Troubleshooting
- Verify with Accounting If the charges shown in Post Payments do not match the expected order or if the system suggests applying funds differently/different amounts
- If a charge does not appear in Post Payments screen:
- Confirm the borrower name selected on the first page is correct
- Confirm the Expect Pay flag is marked for YES
Video Walkthrough: