Primary Department Supported: Servicing/SAG (Special Assets Group)
Description: Where to Mark a Loan as Escrow Pay when requested; How to add the Escrow Number for Escrow Pay and How to review and add the Title Company
Super Powers? – YES
Developer Support? - NO
Common Situations
-
Requests that a loan be set up as Escrow Pay due to a borrower entering a special servicing or monitored scenario.
-
Why? The borrower may require funds to be handled through Escrow instead of standard payment workflows.
-
-
Product Support must also obtain approval from Helen and Richa before making any changes.
Important Considerations & Best Practices
-
Always ensure documented approvals department heads are CC'd and included in the ticket before proceeding
-
SAG: Tera Drey, Val Davis
-
Servicing: Tina D'aigle, Jennie Drake
-
Accounting: Helen Yoon, Richa Pandey, Megan McKell
-
- Requests to add Escrow Pay that come from Servicing:
- Accounting should provide approval to mark the loan for Escrow Pay and to add bank account information for the Title Company
-
Setting up this Escrow configuration includes three required steps:
1. Marking the loan as Escrow Pay on the Terms Tab.
2. Adding the Escrow Number on the Closing.
3. Verifying and adding Title Company wiring and property information (as approved or confirmed by accounting dept)
Instructions:
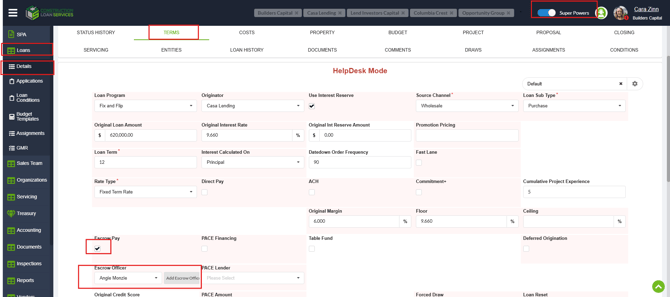
1. Mark the Loan as Escrow Pay on the Terms Tab
From LMS Menu-
Select Loans
-
Select Details, click to open details
-
Select Terms Tab
-
Turn on Super Powers.
-
Click Edit.
-
Mark the checkbox for Escrow Pay
-
Click Save & Close.
2. Add the Escrow Number
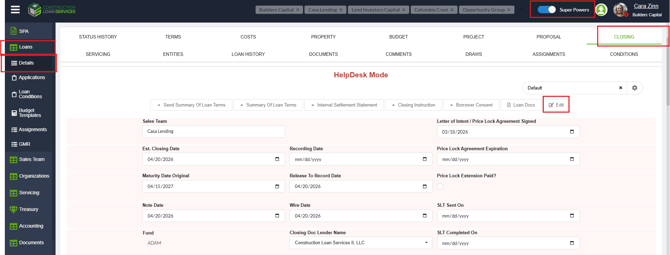
From within the Loan Details:
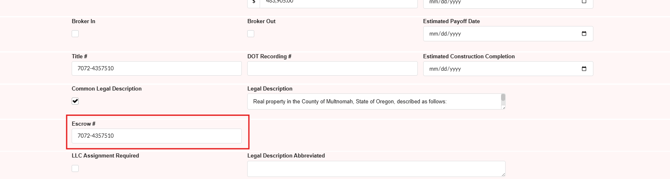
1.Select the Closing Tab
2. Turn on Super Powers.
3. Click Edit.
4. Locate the Escrow # field and enter the number provided in the request.
5. Click Save & Close.
3. Verify Wire and Property Information for the Title Company
From within the Loan Details
-
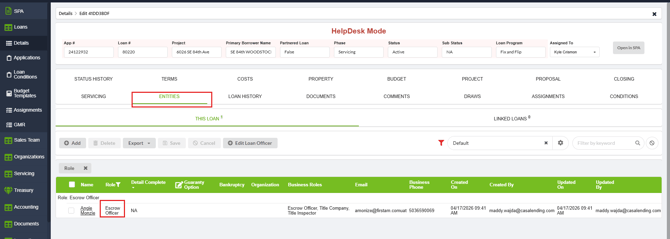
Select the Entities Tab
-
Verify the the Escrow Officer Listed. (The name here should match what's on the Terms Tab)
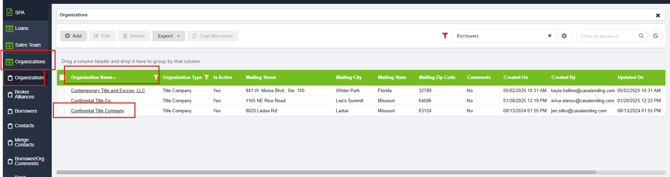
2. From LMS Menu, Select Organizations
-
Select Organizations
-
Locate and open the Title Company associated with the loan.
-
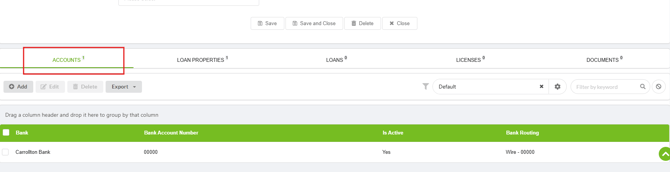
Within the Organization's details select the Account's tab to confirm the banking information matches what was provided in the request
-
If Bank Account information is missing or different, reach out to Accounting Leadership and get approval to add it
-
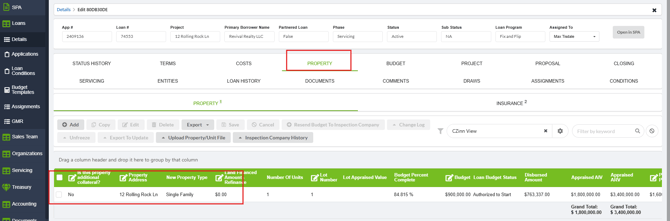
3. Return to the Loan Details and select Properties tab
- Locate the Property associated with the loan and click to open Property Details
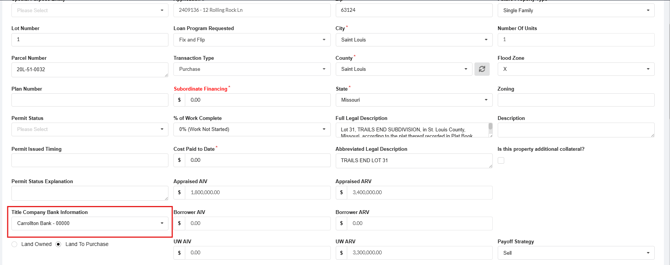
- Review the "Title Company Bank Information" - The bank information previously reviewed/added will be listed or able to be selected from the dropdown.