
Primary Department Supported: Product Support
Description: Setting up LMS access for internal users, including email verification, contact and user creation, role and department-based permission assignment, and final access confirmation
Super Powers Needed? - NO
Developer Support Needed?- NO
Important Considerations & Best Practices
-
Review and confirm the new user’s job title and assigned department to determine which permissions and roles should be used
-
Access for internal users is determined by both role and department
-
Use existing employees with the same job title or role as a reference
-
-
When assigning User Account roles and permissions:
-
Use Role Templates whenever possible (e.g., Loan Officer, Underwriter, Servicing Analyst)
-
Then add any missing roles by reviewing another internal user with the same job title or department
-
-
Always send a confirmation email with LMS access instructions once setup is complete and email address for the user is active in Outlook.
-
Example Confirmation Email:
"LMS user access has been assigned to [Name of User] at the email address [email address]. To access this LMS account for the first time, please use the following link: https://my.builders-capital.com/. Enter your email address and click “Sign Up Now” to finish the enrollment process. If you have any questions or need assistance with access, please contact productsupport@bc-exchange.com."
Instructions
1. Confirm User Email Address
-
Make sure the email address requested in the ticket makes sense for the new hire's assigned department or originator
-
Search for the individual in Outlook to confirm they have an active email address
-
If no email is found you may proceed with building the contact based on the ticket but you will not be able to send the final enrollment instructions until the email address is created and active
-
Review outlook daily and send the confirmation email with instructions once the email address is active
-
2. Create Contact and User Account
From the LMS Menu:
-
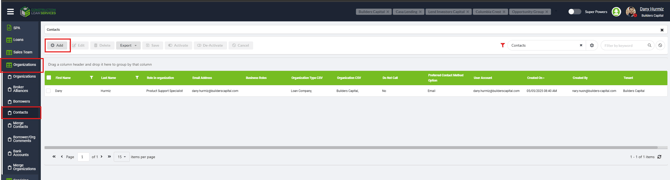
Select Organizations
-
Select Contacts
-
Click Add
-
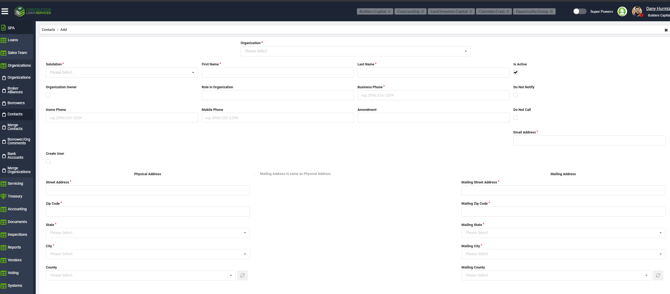
Complete all required fields:
-
Organization: Builders Capital, Casa Lending, or Lend Investors Capital (this will pre-fill address information, you can leave as-is)
-
Name
-
email address
-
phone number
-
-
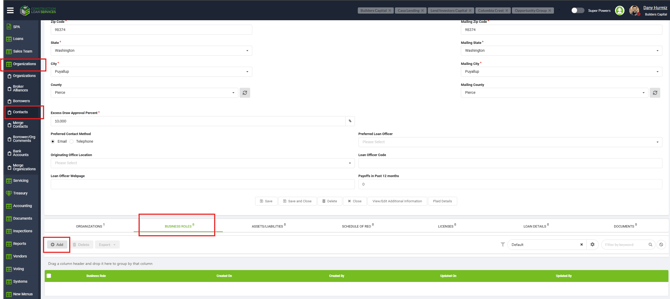
Create the User Account by selecting Create User
-
Enter a temporary password: bc1234
-
Select the Role (should closely match the job title, e.g., Accounting, Transaction Coordinator)
-
Confirm “Is External User” is unchecked
-
Click Save and Continue
-
-
Assign any required Business Roles
-
Use another individual with the same job title as a reference
-
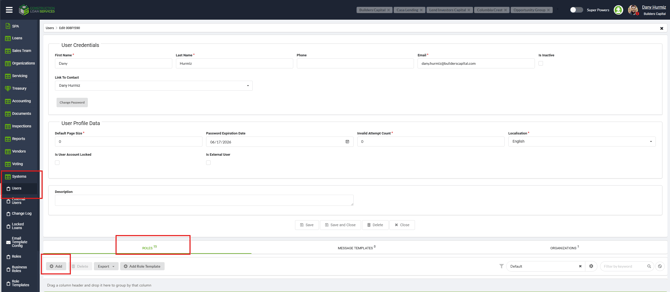
3. Locate and Modify Internal User Account
From the LMS Menu:
-
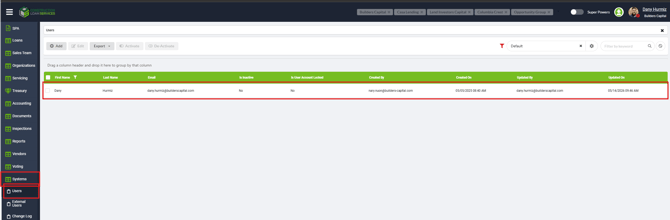
Select Systems
-
Select Users
-
Search using first/last name or email address
-
Select the user to open account details
-
In the user account details:
-
Click Add Role Template to assign predefined role-based
- Search for the applicable role or template
-
If more permissions are needed, click "Add" to assign individual roles
-
Check the box next to the role(s) to assign
-
Click "Add Selected" to apply permissions
-
4. Send Completion and Access Confirmation Email
-
Once the contact and user account are complete, send the confirmation email to the active email address on file or place the ticket on hold and check Outlook daily until the email is active.