
This process is used to convert a user's custom view into a System View, making it visible to anyone in LMS.
Departments and Access
Primary Department Supported: Product Support / All Departments
Super Powers Needed? NO
Developer Support Needed? - NO
Common Situations
- An internal team member requests a shared view that should be accessible to all users
- A view has already been created but is only visible to the original creator
- Product Support needs to enable "System View" so it can be used across teams
Important Considerations & Best Practices
- Only the original creator of the view can enable the “System View” checkbox
- Temporary access is required to update the view settings to allow "System View"
- You must grant System Administrator access to the view owner before making changes
- Always remove elevated permissions and clear proxy after completing the update
Instructions
1.Identify View Owner
- Determine the user who originally created the view
2. Locate the View
- Navigate to the LMS screen where the view is used (example: Loans → Details or Loans → Loan Conditions)
- Confirm the correct view is selected
3. Grant Temporary System Administrator Access
- Navigate to: Systems → Users
- Search for and open the user’s profile (view owner)
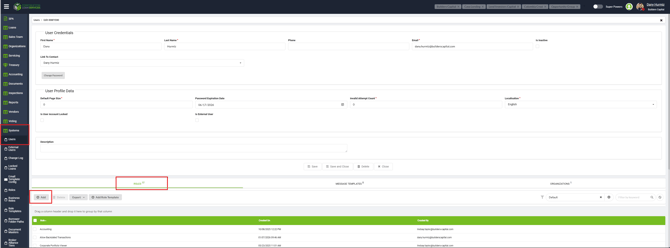
- Add the role: System Administrator
- Click Save and Close
4. Proxy as the User
- Click your name in the top-right corner of LMS
- Select Proxy
- Search for and select the view owner
5. Enable System View
- Navigate back to the screen where the view exists (example: Loans → Details or Loans → Loan Conditions)
- Select the view from the list needing to be updated
- Select the Settings (gear icon) next to the view search
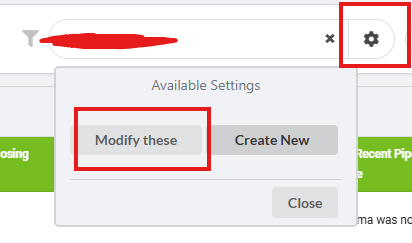
- Click Modify
- Check the box labeled “System View”
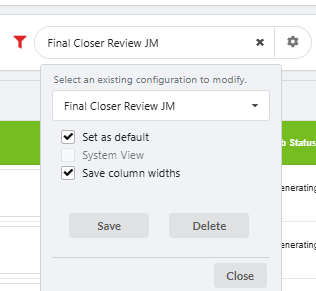
(Notice how the box is greyed out when the user does not have the correct access) - Click Save
6. Remove Access and Exit Proxy
- Clear Proxy
- Navigate to: Systems → Users
- Open the user’s profile
- Remove the System Administrator role by selecting the role and clicking "Delete"
- Click Save and Close
Troubleshooting
-
Unable to enable System View:
- Confirm you are proxied as the correct view owner
- Verify the view was created by that user
- View not visible to others after update:
-
Confirm the “System View” box was checked and saved
- Ask users to refresh or re-open LMS
-
- User cannot be proxied:
- Verify the user has active LMS access
-
Confirm spelling when searching for the user