
Primary Department Supported: Accounting
Description: How to void a principal charge from the Loan History and repost the corresponding payments
Super Powers Needed? - YES
Developer Support? - NO
Context and Common Situations
- Accounting may request a principal charge to be voided because funds paid in the Credit Card Portal, get applied incorrectly and with the wrong labels.
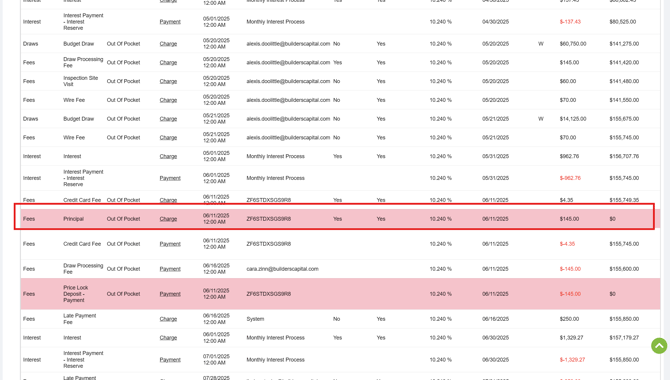
What Happened? – Instead of making interest payment and linking the payment to the existing interest charges, LMS added new charges on the Loan History called a Principal Charge. LMS then took the funds and applied payments to the Principal Charges.
- Product Support needs to void both the Charge and the Payment Linked to it. THEN Product Support will apply the funds to the correct charge.
Important Considerations & Best Practices
- The label/ payment type linked to a Principal Charge are usually incorrect. Refer to the ticket itself to know what the payment was intended for
- Example: Principal Charge for $1,000 and a Price Lock Deposit Payment for $1,000 linked to the Principal Charge: Price Lock Deposit is the incorrect payment type: This should have been a payment type of interest payment.
- When updating the transaction type on the Principal Charge, match the charge type to the payment it was INTENDED to be for.
- Example: A Principal Charge was created because the funds were supposed to pay an interest payment: Change the Principal Charge Transaction Type to read “Interest – Interest”
Instructions
To Void and Fix a Principal Charge and Repost the Payments:
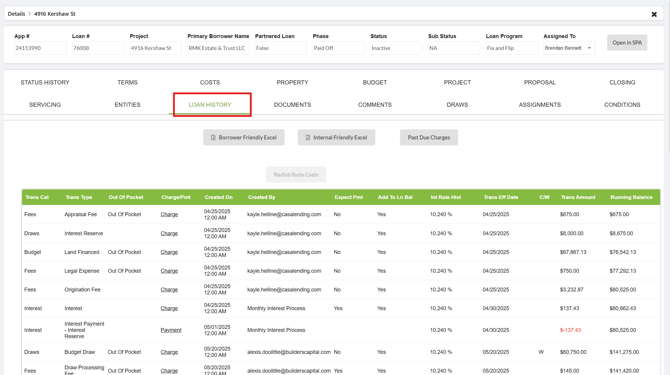
- Void the Loan Payment
From the LMS Menu, select:
- Loans → Loan Details → Loan History
- Turn on Super Powers
- Locate the payment created that matches and is linked to the principal charge
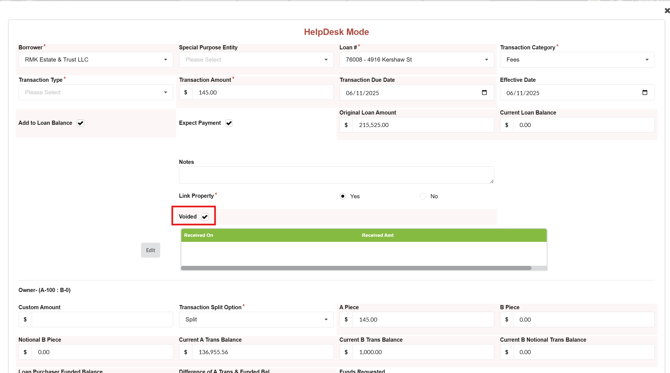
- Click to open the details
- Checkmark the box that says “Void”
- Click Save and Close
- *there are screenshots and a video walkthrough in the Loan Payments - Voiding a Loan Payment article*
- Void the Principal Charge
From the LMS Menu
- Loans → Loan Details → Loan History
- Turn on Super Powers.
- Select the charge referenced in the support ticket.
- In the transaction type and category dropdowns, change the Transaction Type and Category to match the payment type it was INTENDED to be for.
- For example: If the intention of the payment was to pay interest: Change the Transaction from “Fee - Principal Charge” to “Interest – Interest”
- In the Notes field, enter: “Original Charge Type: Principal Charge – Invalid Transaction Type.”
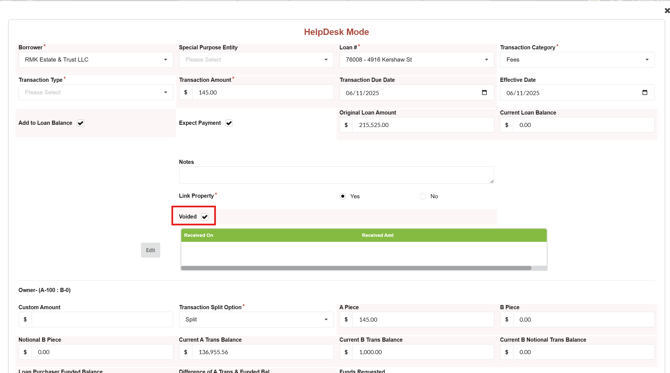
- Checkmark the Void box.
- Click Save and Close.
- Repost the Loan Payment to the correct charge
From LMS Menu:
- Select Accounting > Post Payments
- Click the box "Post Payment"
- Fill in the following:
- Mark the “Portal” option at the top
- Select/Enter Borrower Name
- Received Date (this should come from the requester)
- Fill in Received Amount
- Click Submit
on the next page
- check mark the box or boxes next to the item that needs paid
- Save and Close
*there is screenshots and a video walkthrough of this in the Post Loan Payment – Adding Out of Pocket Payments article*